Posts

Showing posts with the label wall art

My Summer Yard Sale Finds

Image
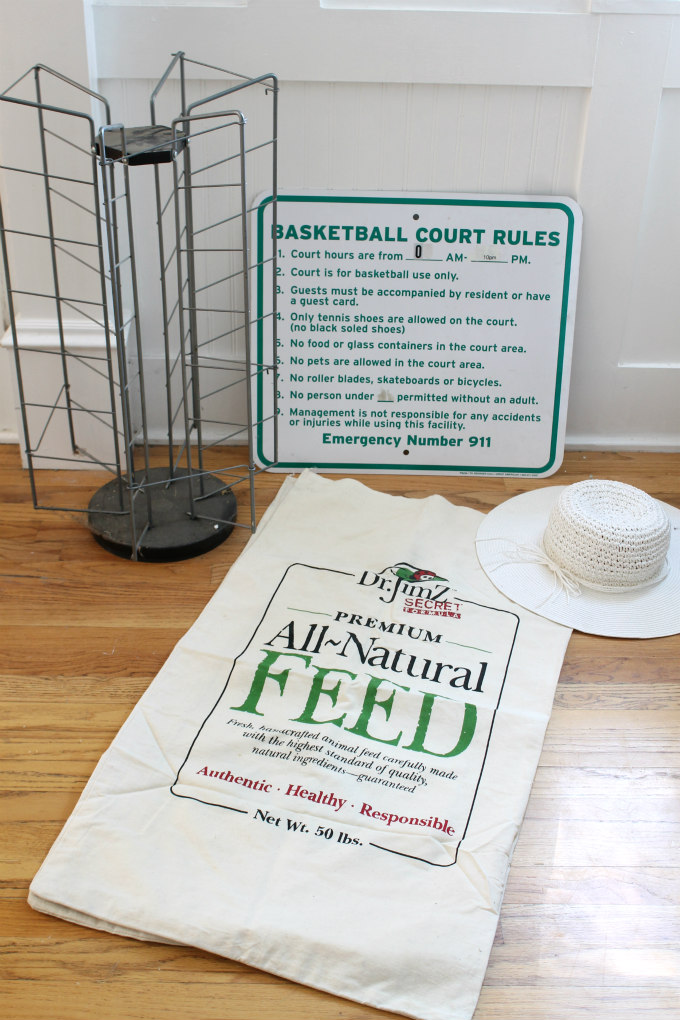
It's no secret that I love to shop yard sales.  In fact, a lot of my home's decor was picked up from various yard sales over the years.  I just find so much joy in rumbling through other people's junk. It's seriously one of my favorite things to do.   Almost every Saturday during the summer months my mother-in-law and I go out for a drive to see if we can catch a few sales and I almost always bring home a few treasures . Today, I want to share what I've picked up at yard sales so far this summer. Let's start with my haul from last weekend: The spinning DVD tower has found a home in our basement holding Wii U games. However, I have a vision of using it at Christmas time to hang our Christmas cards on using clothes pins.   The metal Basketball court rules sign (which I got for free) now hangs in my boy's room. I love my new floppy white sunhat and have already worn it to the lake.  I like that it folds up and can be placed in a suitcase.  I'll be ta...

More Fake Planks In Our Dining Room

Image
Remember when I added fake planks to my bedroom wall using a level and a pencil?  (See that post HERE )  Well I love the look so much that I decided to add fake planks to our dining room wall as well. But I did something different this time.  Instead of using a pencil to make my lines, I used a black colored pencil.  Before, I had to go over the lines with a matte polycrylic sealer to protect the lines from smearing, but because a colored pencil has wax in it, it doesn't really smear that much and so there was no need for the sealer.  However, if the lines were to get wet they would smear. So if you are planning to do this in a kitchen or a bathroom, or if you are someone who washes your walls, then you will want to add a polycrilic sealer over the pencil lines. I can't imagine my walls getting wet here in our dining room, so I skipped sealing it. Also, the lines could possibly be done with a permanent marker as well and then you wouldn't need a sealer, but I ...

Salvaged Wood Coat Rack

Image
I recently shared our basement makeover reveal, did you happen to see it? If not, be sure to catch it HERE , It's a pretty great Before and After if I don't mind saying myself. In that reveal I shared this coat rack that I made out of some salvaged wood and today I wanted to share a little more about it.  This coat rack began with a little white peg board that I picked up at a Fancy Farmgirls Sale that is local here in Idaho. I actually picked up quite a bit of goodies at that sale as you can see from this next picture. I'm sure you've notice a few of these things from around our home, like the hanging planter, that is a show stopper in our sunroom.  I needed some hooks by our back entryway so that my boys would have a place to hang up their coats and backpacks when they came home from school, but this little peg board wasn't gonna cut it with only 4 pegs.  So I had to get creative.  I went out to our garage to see what I could find.  I even checked out what ...

Using fabric as picture mats

Image
 Today's post is about an easy project anyone can do to create a stylish look to an otherwise boring picture frame.  You may have seen this project before because I shared it a while back on City Farmhouse . But I thought I'd go ahead and re-share it today just in case you missed it. So the picture frame that I wanted to share with you today is the large one on the bottom picture ledge with the black and white buffalo check patterned photo mat.  And by the way, if you haven't seen my tutorial on how to make my picture ledges, you can read all about it HERE .  These ledges are incredibly simple and inexpensive to make, and the best part is that they allow me to move around my pictures without leaving a bunch of extra nail holes in the wall.  To give my photos a custom look, I like to add either a wrapping paper, or else like in this case, a pretty fabric to my picture frames. It is so simple to do but can totally change the whole look of my wall display. This is...